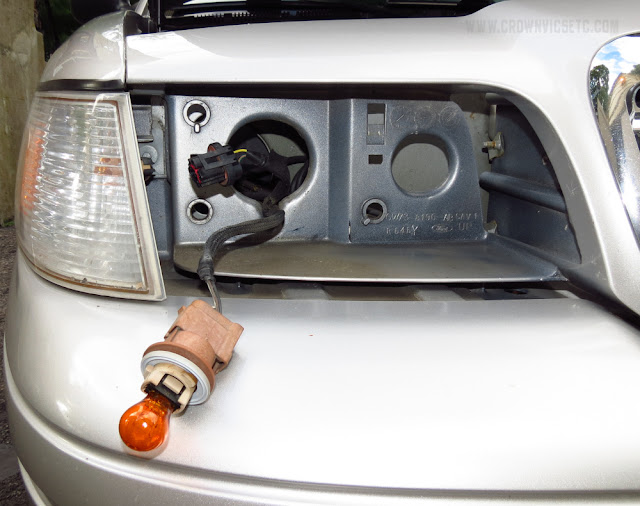
Center brake light.
Center high mount brake light.
5/7/26
Vic's A/C had been acting strange. I remembered that last year, it would take a while to kick in and blow cold. This season, the few days so far that have been warm, it would take anywhere from 10-60 minutes to go blow cold! Thing is, I didn't hear the compressor go on and off like usual when the refrigerant is low. For kicks, because it was on clearance, I tried one of those DYI rechargers. The built-in pressure gauge was pinned to the max. Wellp, long story short, "Taxi Guy" is up from Florida for the season and working at a local repair shop, and they did an oil change and filled the refrigerant. They told me if I notice it ever acting up again, to come back in since they used a UV dye to detect any leaks. Next week it's supposed to get into the 80s, so it will get a good test!
5/13/26
Over the last month or so, I've caught a whiff of gas odor when parked in the driveway. The other day, it seemed even stronger. I didn't see any drips anywhere on the ground, and the filler-neck was also dry. My boyfriend actually got under the car yesterday after I said "what about the fuel filter?". Taxi Guy was able to replace it today. He said he actually needed help removing the old filter without breaking anything, it was so stuck onto the fuel lines! He thinks it may very well be ORIGINAL... Should be interesting watching for any changed in fuel mileage and acceleration.
After having a Crown Vic parked in the same section of the driveway since 2000, I usually know what things will look like after snow.
As I type, Massachusetts is in the middle of a "Noreestaa", or "nor'easter" to foreigners. That means the return of FASTBACK VIC!
The wind blows snow in such a way there will be a totally bare spot on the upper-driver corner of the windshield, and a big snow wedge on the trunk, making the entire car look like some sort of sleek, frosting-covered fastback car.
FINALLY!
I have gotten a car to hit 200,000 miles!
![]() |
| Vic 3.0 hit 200,000 miles on 1/19/2026 |
(June 2024 - approx 177,000 Miles)
This one's almost too painful to recollect! But here's an abridged version of the repair experience...
There had been some random drips appearing under Vic's front end for a while, but I couldn't actually see anything dripping. Fluid levels all were pretty OK. Then the drips got worse, and I was actually getting wispy smoke from under the hood, so we got under and looked around. Sure enough, the transmission lines were rusting through in two areas.
LONG story short, as many of you know, these lines are no longer available from Ford, and it appears NO ONE offers them aftermarket.
I managed to score an NOS set, and we thought we could install them ourselves in Todd's driveway. ANOTHER long story short, do NOT try this job at home unless you have a lift and LOTS of patience. In the end, especially after one fitting snapped off in the housing, we had to give up with the old lines still stuck on the car, and have the car towed to a transmission shop I had used before for my Javelin.
Other than their obviously using another vehicle to push the car into their shop, they did a great job.
![]() |
| Transmission fluid had been seeping through these areas, then actual drips began |
![]() |
| Take a good look... HARD to find |
![]() |
| Car vs. Man... guess who won that day? |
![]() |
| Vic takes a trip to the transmission shop |
On 10/5/23 (mileage approx 167K) I noticed something was making a noise under Vic. At first I thought maybe a spring had broken, as it had a metallic rubbing/scraping sound, and seemed to have to do with the car moving up and down. Then, one day while driving home on the highway, I noticed the gas gauge was reading all funny.
When I got home, I looked under the car, and didn't see as much sunlight as I expected. Why? Because the gas tank was hanging down!
One of the two metal straps that hold the tank up had rotted away. The other wasn't far behind.
Parts were ordered, arraignments were made with "Jeep Guy", a friend not afraid of rust work, and we towed the car to his shop.
![]() |
| "What's that strange noise?" |
![]() |
| Strapped up off the ground |
![]() |
| Borrowing municipal parking lot for a few minutes... |
![]() |
| Ready to hit the road the next day! |
NOTE that all versions of the plastic switch panel are prone to breakage of the mounting tabs. If you are like me, it will annoy you to no end having a panel that pops up all the time.
These photos are from my '08, but will help you with older versions as well.
The job is otherwise very simple. The hardest part is removing the switch-block from the panel. I suggest two thin screwdrivers to keep the panel pried apart for easier removal.
![]() |
| New switches |
![]() |
| Look for the small slot where it is safe to insert a flat screwdriver |
![]() |
| Try not to mar the plastic |
![]() ![]() |
| You do NOT want to break this tab! Older versions are worse... The plastic is more brittle and has an added metal "gripper" |
![]() |
| Electrical connectors that need to be removed |
![]() |
| Old switches removed. Notice the "shmoo" that collects around them! |
For a car that was never intended to still be on the road, Vic 3.0 is almost at 200,000 miles! The odometer doesn't display properly, but the last time I could read it (12/21/25), it said 199,124 miles. I've always wanted to watch an odometer hit 200K, but since it is broken, I probably will miss it (or already did).
When my mother passed away, her low-mile 2011 Crown Vic was taken over by my father, after we sold his 2010 Grand Marquis in 2023.
He recently told me his wipers weren't moving very fast. I checked, and sure enough, they were moving slooow. When I switched them to high, they moved at normal speed. So I knew what was coming: a new wiper motor. It wasn't making any struggle-noises, but I knew things weren't good.
Sure enough, in between snowfalls, the motor quit altogether. Panic set in, as we had just got snow, but were due to have a warmer, rainy day.
Panic set in, as I no longer had access to indoor work space. So I decided I was going to brave the cold and swap in a spare rack/motor unit we had in storage for just such an emergency.
I started the project at roughly 1PM, and finished at about 3PM. Even though it was well under freezing outside, my fingers worked just fine. Probably because they never got wet with snow. One thing's for sure, having done the job a couple of times before AND finally having power tools made the job easier and quicker!
![]() |
| The snow has stopped, the job begins... |
![]() |
| Top cover removed |
![]() |
| New (used) unit installed... this is where tons of organic "ick" collects |
![]() |
| Job DONE. Wiper arms had to be reinstalled a couple of times, since the locator pins are always missing |
SO after installing nice new headlights in Vic 3.0, I decided to bite the bullet and also install the NOS grille I had been sitting on for MANY years.
This is a simple install. All you need to do is remove the black plastic filler panel/radiator cover, then use a socket (I forgot to note the size for you, I THINK they are 7/16") and remove the retaining nuts all around the back of the grille. Swap grilles, and put the nuts back... simple! But don't overtighten them... don't want to snap the posts!
![]() |
| Now is a good time to touch up the paint around the grille... you KNOW you need to! |
![]() |
| Old on bottom... note the corrosion on the chrome |
![]() |
| Looks like a new car! Now that license plate holder needs to be changed... |
I am way behind with updates, so to catch up a bit, here's a quick rundown of how to swap your crummy, cloudy old headlights with nice, clear, shiny new ones. A while back, I had scored a brand new original Ford and one super nice used example, and last year decided to install them and stop worrying that I'd be inviting some sort of smash-up simply by them being there (would be my luck, just like every single time I get brand new tires, I get nails and screws stuck in them!).
![]() |
| STEP ONE: Open the hood, and remove the black plastic filler panel/radiator cover |
![]() |
| STEP TWO: Take a tool that you are comfortable with and slide these two retaining brackets UP to free the headlight |
![]() |
| STEP THREE: Unscrew the round plastic retainer around the main headlight bulb. Mine was broken and slid right out. You can now slide the headlight unit out of the car |
![]() |
| Headlight removed showing wiring harness |
![]() |
| Before... after... |
Dad's 2010 Grand Marquis went to a new home today, with a whopping 70,615 miles on it. It went to a local man, so we may see it out and about! Dad is now driving Mom's 2011 Crown Vic.
12/21/11-7/14/22