Welcome to the Crown Vics ETC blog!

On April 6, 2000, I purchased a 1998 Ford Crown Victoria LX HPP with 23,490 miles. I decided to start a little website for it featuring a running log of my experiences with the car. Vic 1.0 was retired in 2015 due to rust and electrical issues. Vic 2.0 was a 2006 P71 in Blue Pearl that belonged to my boyfriend. It was a Ford demo and never saw actual police use. It was damaged in September of 2018 with well over 186,000 miles. It was replaced by Vic 3.0 in October 2018, a 2008 P71 in Silver Birch with 120,971 miles. To read posts prior to 2010, click a link at right, or go to Crown Vics, ETC.

Saturday, January 22, 2022

My Original Key Chain Finally Falls Apart...

On April 6, 2000, I purchased Vic 1.0 from Bonnell Ford.  My salesman was one Mark Donovaro.  

On November 27, 2021, I drove Vic 3.0 to Bonnell because I needed to replace my original key chain, which had finally fallen apart.  Who did I ask for a new one?

Mark Donovaro, now a sales manager.  

HOW TO Program Tire Pressure Sensors on a Crown Victoria

NOTE:  I just realized I had one big error in these instructions.  If you tried them before with no luck, try it again!

Vic 3.0 is the first car I've owned with TPMS (tire pressure monitoring system).  But I've watched Mystery Mechanic deal with them on his cars for years.  To be honest, I think it is a pain in the backside.  They don't go off until the tire is so low I can tell it is just by the way the car drives.  Newer cars can actually tell you the current PSI per tire, which is nice, but just like some people who use their own blood pressure cuffs, they can make you paranoid and a slave to the PSI display!

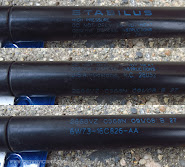
Anyhoo, things were a mess at the Homestead this past month, resulting in my scrambling to get snow tires onto Vic before the first snow storm in Massachusetts.  MM has one Ford tire programmer that works on all our Fords (so far) and I finally borrowed it yesterday.  He told me the proper procedure for programming my snow tire rims to the car.  I will now attempt to remember the steps:


1) Put key in ignition
2) Push down/tap brake pedal ONCE
3) Turn key to the ON position (so that dash lights go on but the car doesn't start) 3 times fast, return to ON position when done
4) Push down/tap brake pedal ONCE 
5) Turn key to the ON position (so that dash lights go on but the car doesn't start) 3 times fast, KEEP KEY TURNED so that dash lights stay on but car doesn't start.  Horn should beep once.  That means the car is ready to read the programmer.
6) Go to the FRONT LEFT (driver side) WHEEL
7) Hold down the button on the sensor programmer and hold it 180ยบ from the valve stems (aka:  directly opposite).  The horn will beep when that sensor has been programmed.  Then go CLOCKWISE around the car, doing the same to each wheel.  
8) When you are done, turn the ignition off and remove the key.
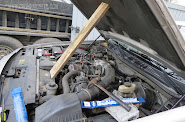
The TPMS sensors on Crown Vic rims are strapped on opposite of the valve stem, NOT like newer cars that have them integrated into the valve stems themselves.

ALSO, at least on a 2008, it takes a while for the TPMS to let you know if your wheels are not programmed.  MM has a newer vehicle with a set of snow tires on rims with faulty sensors, and it takes exactly the same distance for him to get a TPMS light on the dash as it did on Vic.  

Tuesday, January 18, 2022

HOW TO Replace Crown Victoria Hood Struts

Last winter, I made a mental note that Vic 3.0 needed its hood struts replaced, as the hood wouldn't stay open, especially on really cold days.  Well, that mental note was forgotten until a year later when temps again started to go down.  I finally ordered new struts from Rock Auto and installed them in December, just before my entire family got COVID... (not a fun experience...)

If you have never replaced these struts on a Crown Vic, it is really pretty simple.  You will need something like a thin flat screwdriver (some sort of hook tool would be even better) and maybe a hammer.  

The struts attach to posts on the car via a type of spring-clip.  To remove the old struts, put the screwdriver (or hook tool) under the metal clip.  Pop it off the top and bottom posts.  To be safe, you may want to place something like a wood board against the hood to prop it open.  Do NOT use your head... 

You can now pry the old strut off the mounting posts.  Take the new strut and LOOSEN the spring clips.  DO NOT REMOVE THEM!  I accidentally popped one off and it took extra tools and anger to get the thing back on.  All you should do is LOOSEN them so that you can push the strut onto the proper post.

Make sure the strut is firmly pushed onto the posts, then push those clips down against the strut.  In other words, re-seat the clips.  The strut should now be firmly attached to the car, and your hood will no longer slam down onto your noggen.

I noticed that the original struts were made by the same people who made the replacements, Stabilus.  I like to use OEM parts when I can afford them, so I was happy about it.

The correct Stabilus part number is (T)SG404024.